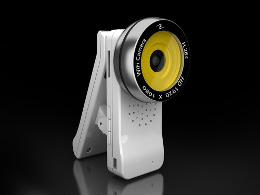
Recently, I got a chinese mini Wi-Fi camera, that was described as H.264 HD 1920×1080. I chose this model as it looked to be easy to mount (due to the form of a pin), independent (does not have to be near a PC or a network socket), mobile (can be easily moved to a different location) and small. It would be quite a good device (for its price), but it appeared to be too unstable. Also, it comes with an awful documentation and too little of information about its capabilities, even in Internet.
I expected to see the name of the manufacturer and the model on the package box or on the device itself, but was not able to do this. In other words, there was nothing, that identified the camera, except its form! Moreover, the package did not include even a document, that would explain, how to use it. However, the box had two QR codes – one for the iOS app and another one for the Android app. So, that’s how I was able to locate websites of (I assume) the embedded software developer (www.qr-cam.com) and (aslo assume) the manufacturer (www.ynkjdv.com). Eventually, the former helped me to find out the rest. By the way, the manufacturer declares its model as 811 WIFI, while the embedded software developer claims, that it (the “modal”, see below) is 601H. So, generally, it looks like the device has two brands and two models – YNKJDV 811 WIFI and Qr-Cam 601H.
So, this camera can be used from iPhone, Android and Windows. Clients for these OSes can be downloaded from the software developer’s website. Unfortunately, none of these OSes is good enough for me, so I started to look, how to use the device directly, i.e., without any specific client application. And, that’s, actually, what we will speak about in this article. Still, I have to say, that I could make it work only with the Windows client. The Android one crashed, when I was trying to watch the video (but, maybe, it’s because I used emulators, not a real Android device). And, regarding iPhone – I was not able to check the corresponding app yet.
The developer’s website has a document for the camera (in the DOC format) in the Downloads section. But, this document appeared to be for a different model of this camera. Thus, according to it, the third button is for choosing the mode (between Wi-Fi access point (AP) and station (STA)), while on my device it is for reset. I used to reset the device around 5 times (trying to switch to the STA mode) before I realized that! Later, however, I found a more actual “document” in a description of the camera on Alibaba. Also, all documents are written in a very poor English…
When turned on, by default the Wi-Fi camera enters the AP mode, in which it creates a Wi-Fi access point with the name like IPCAM_AP_XXXXXXXX, where XXXXXXXX is the serial number. So, to gain access to the video stream you just need to connect to this AP using the default password, which is “12345678”. When you do, you’ll get the IP address like 192.168.1.169 and the web camera will be accessible by 192.168.1.168. Needless to say, that this is very insecure – i.e., if you want to continue using the camera in this mode, you should change at least the password (e.g., using MsgID=38, see below). Anyway, it’s a very interesting feature, as you can configure it as a video transmitter and, e.g., your mobile phone as a video receiver and use them together anywhere you like (you will need to keep the distance between them short enough though).
I used the AP mode just to get access to the camera and switch it to the STA mode. Before, I tried to do this using the “mode” button (which eventually appeared to be the reset one) and WPS. But, as the mode button appeared to be for reset, I guess, WPS is not actually available for my model… So, the only way to switch it to the STA mode is to use a client application (I used the one for Android). However, there also exist a simpler way (to use MsgID=38, see below)…
Also, as I knew nothing about, how to use the Wi-Fi camera without a dedicated application, I made a port scan to determine, which ports are available. So, here is the list of them:
- TCP/80 and TCP/8150 looks to be equivalent and both run the mini_httpd web server (version 1.19). The index page of this web server uses an ActiveX control, that runs a part of the Windows client. But, this web server also has a very special and useful cfg.cgi script, that will be reviewed later. By the way, this script and port 8150 seem to be used by the Android app to configure the device.
- TCP/554 runs the SouthTech Streaming Server v1.0. The special features of this server is the H.264 format of the video stream and the RTSP-over-TCP mode (RSTP is usually used in conjunction with UDP). But, to be able to use RTSP you need to know the stream URL. And, I had bad times trying to determine such URL for this camera, but, seems, I did it. Here they are:
rtsp://192.168.1.168:554/0– for the main video channel and
rtsp://192.168.1.168:554/1– for the additional oneIn other words, to view the stream using, e.g., vlc you need to:
vlc rtsp://admin:admin@192.168.1.168:554/0However, I was not able to get the video so far… VLC claims, that it’s not receiving any data. Also, it seems, that none of client applications uses RTSP.
- TCP/2161 is a port for access using the Telnet protocol. It’s interesting and suprising as no documentation actually mentions this capability! Therefore, it feels like a backdoor, to be honest… Also, I was not able to login on this port with standard credentials like the username
adminand the passwordadmin(tried a couple of others too).By the way, the internal hostname of the device looks to be X3, as the telnet prompt is:
X3 login:
- TCP/7150 is declared as a port for data and that’s, actually, true. Thus, this is the port, that the Windows client uses to load the video stream from the camera. This port uses some proprietary protocol, which seems to support configuration data like Wi-Fi settings etc as well (I did not see, that the Windows client used any other port, while I did configure things within it).
- UDP/1900 is used for uPnP (Universal Plug’n’Play). However, I was not able to discover any services of the camera using this protocol. But, I did see multicast messages from this port of the camera, what means, that the camera is trying to discover services.
- UDP/2000 is known as the port for Cisco SCCP (Skinny Client Control Protocol). In particular, it’s known to be used by RTP (Real-time Transport Protocol) for audio data transfer. However, I doubt, that this is the case (I have no idea how to check though)…More likely, it’s used by the camera to announce itself to client applications. For this it sends multicast messages from this UDP port to the port 1999 of address 239.255.255.255 all the time. But, the worst thing is that in these multicast messages it sends the configuration of the camera including the password, that is needed to access the video stream:
U 192.168.1.168:2000 -> 239.255.255.250:1999
  ........................601H.........'......V4.008.0918.30......2015.01.08.091800...IPCAM_8000XXXX.......
  .......................................................................................................*.
  ..........192.168.1.168.......00:C1:A1:62:27:96...255.255.255.0.......192.168.1.1.........8.8.8.8........
  .........................................................................................................
  .........................................................................................................
  ...........................................................IPCAM_AP_8000XXXX.............admin...........
  ..............xxxxxxxxxxxxxx..........................xxxxxxxxxxxxxxxxxxxxxxxxxx.........................
  .............................................xxxxxxxxxxxxxxxxxxxxx...................=.%.z...2......6....
  123456..............................9..................................... .........IPCAM_8000XXXX.......
  .........................0.......................P.....................................@... ........... .
  ........
Moreover, here you can also find the password for your Wi-Fi network (if you used to configure it) and P2P username and password!..
- UDP/3207 is known to be used for ONVIF web service discovery. To test it (and other ONVIF related ports) I tried to use ONVIFmd, but, again, no luck for this device.
Now, let’s check, what can be done with the cfg.cgi script… Here are its basic parameters, that must be specified with every request:
- The
Userparamater should be set to the username, e.g., toadmin(you can add other users, in theory). - The
Psdparameter should be set to the password of the user. By default, it’s alsoadmin(but, not need to change it, as it sends the password in multicast messages anyway). - The
MsgIDparameter determines the action, that should be performed on the server. This action is specified as a number.
All these parameters are to be specified in the GET query, as follows:
http://192.168.1.168:8150/cfg.cgi?User=admin&Psd=admin&MsgID=20If the request fails, the camera returns just NO, otherwise it usually returns OK.
The main parameter is, certainly, MsgID. And, of course, there is absolutely no information about it in any documentation. So, I needed to figure out possible action numbers on my own. And, here is what I succeeded to determine:
MsgID=5
Not sure, what does it mean, but this action returns some total number:
Total 0
MsgID=16– Get the current time
20151225151046MsgID=17&time=YYYYMMDDHHMMSS– Set the current time
MsgID=18– Reboot, I guess
OKREBOOT
MsgID=19– Reset
This action makes the device forget all customizations and return to factory defaults. Certainly, the device reboots after that.
OKREBOOT
MsgID=20– Get the picture
This is definitely the most useful action, as it returns the current picture from the camera:

MsgID=23– Get image settings
var VIDEO_Brightness=128; var VIDEO_Contrast=128; var VIDEO_Hue=128; var VIDEO_Saturation=128; var VIDEO_Sharpness=128;
MsgID=24&VIDEO_Brightness=...– Modify image settings
Before we proceed, let’s make a pause to discuss things, that have become known…
As you can see, some actions of cfg.cgi return data in format var Bla_Bla="bla"; .... And often, the very next action allows to modify these data. The 23/24 pair of actions is an example. To change values of the variables, that were returned in the “fetch” response, you need to specify them in the query string of the “update” request as &Bla_Bla=foo.
Now, when we have cleared this up, let’s continue:
MsgID=28– Get short summary
var INFO_DevModal="601H"; var INFO_DevName="IPCAM_8000XXXX"; var INFO_HardType=3; var INFO_SN="8000XXXX" var INFO_SoftVersion="V4.008.0918.30"; var INFO_ExistWiFi=1; var INFO_ExistSD=0; var INFO_ExistFlash=0; var INFO_ethLinkStatus=0; var INFO_upnpStatus=0; var INFO_WlanStatus=1; var INFO_p2pStatus=1; var VIDEO_IsMirror=0; var VIDEO_IsFlip=0;
var VIDEO_Width0=1280; var VIDEO_Height0=720; var VIDEO_FrameRate0=25; var VIDEO_BitRate0=2048;
var VIDEO_Width1=320; var VIDEO_Height1=240; var VIDEO_FrameRate1=15; var VIDEO_BitRate1=384;
var NET_DDNSDomain=""; var AUDIO_Active=1; var AUDIO_SoundTriggerActive=0; var MD_Active=0; var DISK_DiskName=""; var DISK_DiskSize=0; var DISK_FreeSize=0; var DISK_MinFreeSize=0; var SMTP_Active=0;
MsgID=30– Get general information
var INFO_DevModal="601H"; var INFO_DevName="IPCAM_8000XXXX"; var INFO_SN="8000XXXX" var INFO_SoftVersion="V4.008.0918.30"; var INFO_FileVersion="2015.01.08.091800"; var INFO_ExistWiFi=1; var INFO_ExistSD=0; var INFO_ExistFlash=0; var INFO_HardType=3; var INFO_TimeZone=8; var INFO_ethLinkStatus=0; var INFO_upnpStatus=0; var INFO_WlanStatus=1; var INFO_p2pStatus=1; var INFO_MainStream="_V1280x720"; var INFO_SubStream="_V640x480_V320x240";
MsgID=32– Get information about users
var User_UserName0="admin"; var User_Password0="admin"; var User_Authority0=3;
var User_UserName1=""; var User_Password1=""; var User_Authority1=0;
var User_UserName2=""; var User_Password2=""; var User_Authority2=0;
MsgID=33– Modify user data
But note, that you can’t change the username of admin.
MsgID=34– Get network settings
var NET_HttpPort=8150; var NET_DataPort=7150; var NET_rtspPort=554; var NET_uPnP=1; var NET_IPType=0; var NET_DevIP="192.168.1.168"; var NET_DevMAC="00:C1:A1:62:27:96"; var NET_SubMask="255.255.255.0"; var NET_Gateway="192.168.1.1"; var NET_DNS1="8.8.8.8"; var NET_DDNSActive=0; var NET_DDNSType=2; var NET_DDNSDomain=""; var NET_DDNSDDNSServer=""; var NET_PPPOEActive=0; var NET_PPPOEAccount=""; var NET_PPPOEPassword="";
MsgID=35– Configure network
I used to configure the IP address and the DNS server using this action.
MsgID=36– Scan available Wi-Fi networks
SSID:Tenda_3DD970 Siganl:26 EncryptType:WPA NetworkType:Infra Auth:WPAPSK Enc=AES
SSID:ilonka Siganl:31 EncryptType:WPA NetworkType:Infra Auth:WPAPSK Enc=TKIP
MsgID=37– Get Wi-Fi settings
var wifi_Active=1; var wifi_IsAPMode=0; var wifi_SSID_AP="IPCAM_AP_8000XXXX"; var wifi_Password_AP="12345678"; var wifi_SSID_STA="xxxxxxxxxx"; var wifi_Password_STA="xxxxxxxxxxxxxxxxxxxxxxxxx"; var wifi_EncryptType="WEP"; var wifi_auth="open";
MsgID=38– Configure Wi-Fi connection
I used to change SSID of the access point and its password. Also, I configured the STA mode for the camera.
MsgID=39– Get video settings
var VIDEO_Standard=1; var VIDEO_VideoType=2; var VIDEO_Brightness=128; var VIDEO_Contrast=128; var VIDEO_Hue=128; var VIDEO_Saturation=128; var VIDEO_Sharpness=128; var VIDEO_IsMirror=0; var VIDEO_IsFlip=0; var VIDEO_Title="IPCAM_80002796";
var VIDEO_Width0=1280; var VIDEO_Height0=720; var VIDEO_FrameRate0=25; var VIDEO_BitRate0=2048;
var VIDEO_Width1=320; var VIDEO_Height1=240; var VIDEO_FrameRate1=15; var VIDEO_BitRate1=384;
MsgID=40– Configure video (I assume)MsgID=41– Get audio settings
var AUDIO_Active=1; var AUDIO_InputType=0; var AUDIO_VolumeMicIn=0; var AUDIO_VolumeLineIn=60; var AUDIO_VolumeLineOut=200; var AUDIO_wFormatTag=1; var AUDIO_nChannels=1; var AUDIO_nSamplesPerSec=8000; var AUDIO_wBitsPerSample=16; var AUDIO_SoundTriggerActive=0; var SoundTriggerSensitive=50;
MsgID=42– Configure audio (also assume)MsgID=43– Get hidden area settings, I believe
var HA_Active=0; var HA_left=0.00; var HA_top=0.00; var HA_right=0.00; var HA_bottom=0.00;
MsgID=44– Configure hidden area (I did not test)MsgID=45– Get motion detection settings
var MD_Active=0; var MD_Sensitive=155; var MD_left=0.00; var MD_top=0.00; var MD_right=0.00; var MD_bottom=0.00; var MD_IsAlmRec=1; var MD_IsFTPUpload=0; var MD_ActiveDO=0; var MD_IsSendEmail=0;
MsgID=46– Configure motion detection (assumed)MsgID=53– Get disk settings
I believe, these settings are for the Micro SD disk, that I my camera does not currently have:
var DISK_DiskName=""; var DISK_DiskSize=0; var DISK_FreeSize=0; var DISK_MinFreeSize=0;
MsgID=55– Get record settings
var Rec_RecStyle=1; var Rec_IsRecAudio=1; var Rec_RecStreamType=1; var Rec_AlmTimeLen=10; var Rec_NmlTimeLen=600;
MsgID=56– Configure recording (I assume)MsgID=57– Get FTP settings
var FTP_Active=0; var FTP_FTPServer=""; var FTP_FTPPort=21; var FTP_Account=""; var FTP_Password=""; var FTP_UploadPath="";
MsgID=58– Configure FTP access (assuming)MsgID=59– Get SMTP settings
Yes, the device can send emails, when appropriate events happen.
var SMTP_Active=0; var SMTP_SMTPServer=""; var SMTP_SMTPPort=25; var SMTP_Account=""; var SMTP_Password=""; var SMTP_FromAddress=""; var SMTP_ToAddress="";
MsgID=60– Configure email (assuming)MsgID=61– Get P2P settings
var P2P_Active=1; var P2P_UID="XXXXXXXXXXXXXXXXXXXX"; var P2P_Password="123456"; var P2P_StreamType=1; var P2P_SvrIP1=61.188.37.216; var P2P_SvrIP2=122.248.234.207; var P2P_SvrIP3=50.19.254.134; var P2P_SvrIP4=46.137.188.54;
MsgID=72
Not sure, what is it, but it returns:
0
MsgID=74
Returns:
000
MsgID=82– Dump configuration
var INFO_DevModal="601H"; var INFO_DevName="IPCAM_8000XXXX"; var INFO_SN="8000XXXX" var INFO_SoftVersion="V4.008.0918.30"; var INFO_FileVersion="2015.01.08.091800"; var INFO_ExistWiFi=1; var INFO_ExistSD=0; var INFO_ExistFlash=0; var INFO_HardType=3; var INFO_TimeZone=8; var INFO_ethLinkStatus=0; var INFO_upnpStatus=0; var INFO_WlanStatus=1; var INFO_p2pStatus=1; var INFO_MainStream="_V1280x720"; var INFO_SubStream="_V640x480_V320x240"; var NET_HttpPort=8150; var NET_DataPort=7150; var NET_rtspPort=554; var NET_uPnP=1; var NET_IPType=0; var NET_DevIP="192.168.1.168"; var NET_DevMAC="00:C1:A1:62:27:96"; var NET_SubMask="255.255.255.0"; var NET_Gateway="192.168.1.1"; var NET_DNS1="8.8.8.8"; var NET_DDNSActive=0; var NET_DDNSType=2; var NET_DDNSDomain=""; var NET_DDNSDDNSServer=""; var NET_PPPOEActive=0; var NET_PPPOEAccount=""; var NET_PPPOEPassword=""; var wifi_Active=1; var wifi_IsAPMode=0; var wifi_SSID_AP="IPCAM_AP_8000XXXX"; var wifi_Password_AP="12345678"; var wifi_SSID_STA="xxxxxxxxxx"; var wifi_Password_STA="xxxxxxxxxxxxxxxxxxxxxxxxxx"; var wifi_EncryptType="WEP"; var wifi_auth="open"; var User_UserName0="admin"; var User_Password0="admin"; var User_Authority0=3; var User_UserName1=""; var User_Password1=""; var User_Authority1=0; var User_UserName2=""; var User_Password2=""; var User_Authority2=0; var VIDEO_Standard=1; var VIDEO_VideoType=2; var VIDEO_Brightness=128; var VIDEO_Contrast=128; var VIDEO_Hue=128; var VIDEO_Saturation=128; var VIDEO_Sharpness=128; var VIDEO_IsMirror=0; var VIDEO_IsFlip=0; var VIDEO_Title="IPCAM_8000XXXX"; var VIDEO_Width0=1280; var VIDEO_Height0=720; var VIDEO_FrameRate0=25; var VIDEO_BitRate0=2048; var VIDEO_Width1=320; var VIDEO_Height1=240; var VIDEO_FrameRate1=15; var VIDEO_BitRate1=384; var AUDIO_Active=1; var AUDIO_InputType=0; var AUDIO_VolumeMicIn=0; var AUDIO_VolumeLineIn=60; var AUDIO_VolumeLineOut=200; var AUDIO_wFormatTag=1; var AUDIO_nChannels=1; var AUDIO_nSamplesPerSec=8000; var AUDIO_wBitsPerSample=16; var AUDIO_SoundTriggerActive=0; var SoundTriggerSensitive=50; var MD_Active=0; var MD_Sensitive=155; var MD_left=0.00; var MD_top=0.00; var MD_right=0.00; var MD_bottom=0.00; var MD_IsAlmRec=1; var MD_IsFTPUpload=0; var MD_ActiveDO=0; var MD_IsSendEmail=0; var HA_Active=0; var HA_left=0.00; var HA_top=0.00; var HA_right=0.00; var HA_bottom=0.00; var DISK_DiskName=""; var DISK_DiskSize=0; var DISK_FreeSize=0; var DISK_MinFreeSize=0; var Rec_RecStyle=1; var Rec_IsRecAudio=1; var Rec_RecStreamType=1; var Rec_AlmTimeLen=10; var Rec_NmlTimeLen=600; var FTP_Active=0; var FTP_FTPServer=""; var FTP_FTPPort=21; var FTP_Account=""; var FTP_Password=""; var FTP_UploadPath=""; var P2P_Active=1; var P2P_UID="XXXXXXXXXXXXXXXXXXXX"; var P2P_Password="123456"; var P2P_StreamType=1; var P2P_SvrIP1=61.188.37.216; var P2P_SvrIP2=122.248.234.207; var P2P_SvrIP3=50.19.254.134; var P2P_SvrIP4=46.137.188.54; var SMTP_Active=0; var SMTP_SMTPServer=""; var SMTP_SMTPPort=25; var SMTP_Account=""; var SMTP_Password=""; var SMTP_FromAddress=""; var SMTP_ToAddress="";
That’s all, that I was able to figure out about features of the cfg.cgi script.
As you can see, the device could be quite powerful, if it was more stable and its features were completed. Unfortunately, while its idea is great, the actual implementation is too buggy (or my device is just broken). Thus, in addition to the above mentioned disadvantages it freezes sometimes. Moreover, I found the following severe implementation bugs:
- The camera has a battery, that allows it to work some time without being connected to a power supply. But, it has absolutely no indicator of the battery power and whether it is connected to electricity. And, it’s not the problem of the described API only – no indicator is available in any of the official apps as well. What means, that developers of the client applications just did not implement it. This, in turn, may means, that this was not implemented in the embedded software too…
TCP/2161 port can, in theory, be related to the battery, as it’s known to be used for APC agents, but, again, credentials, that are needed to access this port, are not known and primary ones do not work.
- If the USB/power cable is connected to the camera at some angle (e.g., if you pinned it somewhere), the power can get lost. Obviously, it’s related to a bad cable connection in the camera. The problem becomes even more critical as you cannot know, that connection is bad, until the camera just tuns off (remember – no power idicator), what also may happen in some time, as the camera has the battery.
Comments
Also available in: Atom
Add a comment